Introduction
You can utilize the Polarbackup service for backing up data from Windows Servers, provided they fulfill the necessary prerequisites.
To back up data from a Windows Server to the Polarbackup cloud, the server needs to be added to the desired Polarbackup account.
How to Add a Server to a Polarbackup Account
Step 1. On the target server, sign in to the Polarbackup account where you want to add it.
Step 2. Refer to the Users/Servers tab, and click the Add Server button.
Step 3. From the User drop-down menu, choose the designated user who will be responsible for overseeing the backup management of this server. Optionally, configure the storage limits for the added server. Additionally, you may specify a backup policy for this server if required. Finally, proceed by clicking the Add Server button.
Step 4. From the Add Server Completed pop-up window, copy the provided Activation Token and click the Proceed with download setup button. This will download the Polarbackup setup file (EXE) on the server.
Step 5. Once the Polarbackup setup is downloaded on the server, run it and proceed with installing the Polarbackup desktop application on the target server.
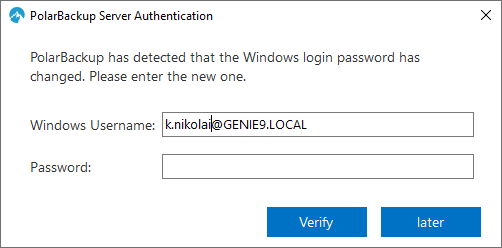
Important! During the last phase of the installation, a Polarbackup Server Authentication dialog will appear. Input the Windows username and password associated with the user profile under which you are installing the Polarbackup application. This Windows profile must possess Administrator privileges on the server. If the profile is part of a domain, specify the domain name followed by the username in the format: DomainName\UserName.
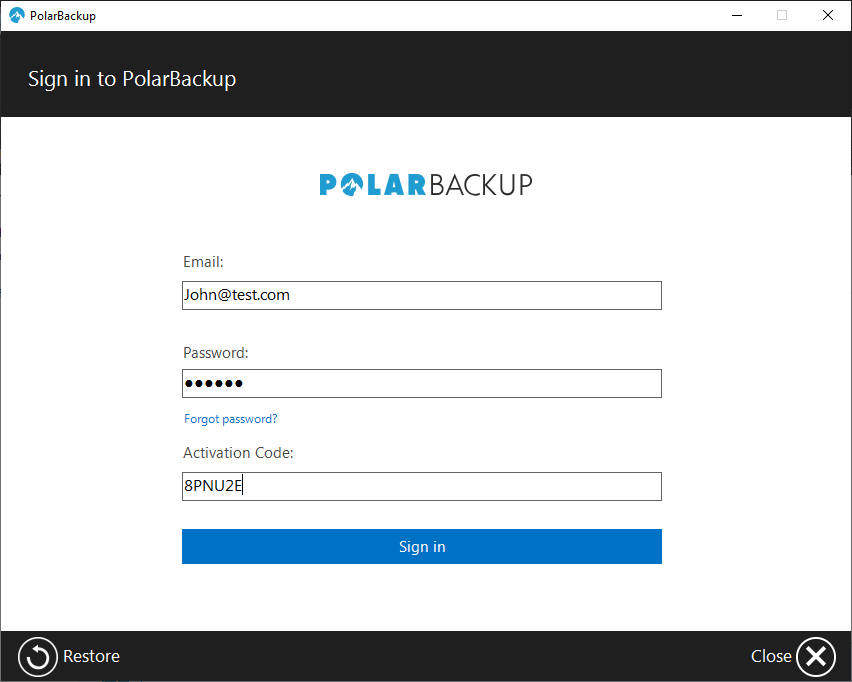
Step 6. After installing the Polarbackup application on the server, proceed to activate it by utilizing the Polarbackup login credentials of the designated User for this server’s backup, as specified in Step 3. Additionally, input the Activation Token for this server exactly as it appeared in the Add Server Completed box, as outlined in Step 4.
Step 7. If you have not assigned a backup policy to manage the backup for this server already, proceed to configure the backup via the Polarbackup application.
Once completed, the Polarbackup application will begin backing up the selected data from this server to the Cloud, and this data will be listed under the Polarbackup profile of the selected user in Step 3 above.