Introduction
To ensure the Polarbackup desktop application can effectively back up your files on macOS Catalina or higher, it’s crucial to grant the application full disk access. Without this permission, Polarbackup might not be able to access important files and folders on your device. This guide walks you through the steps to allow full disk access to the Polarbackup application on macOS Catalina or higher.
How to Grant Zoolz Full Disk Access on macOS
- Click on the Apple menu icon
 and select System Preferences.
 - Click the Security & Privacy option.
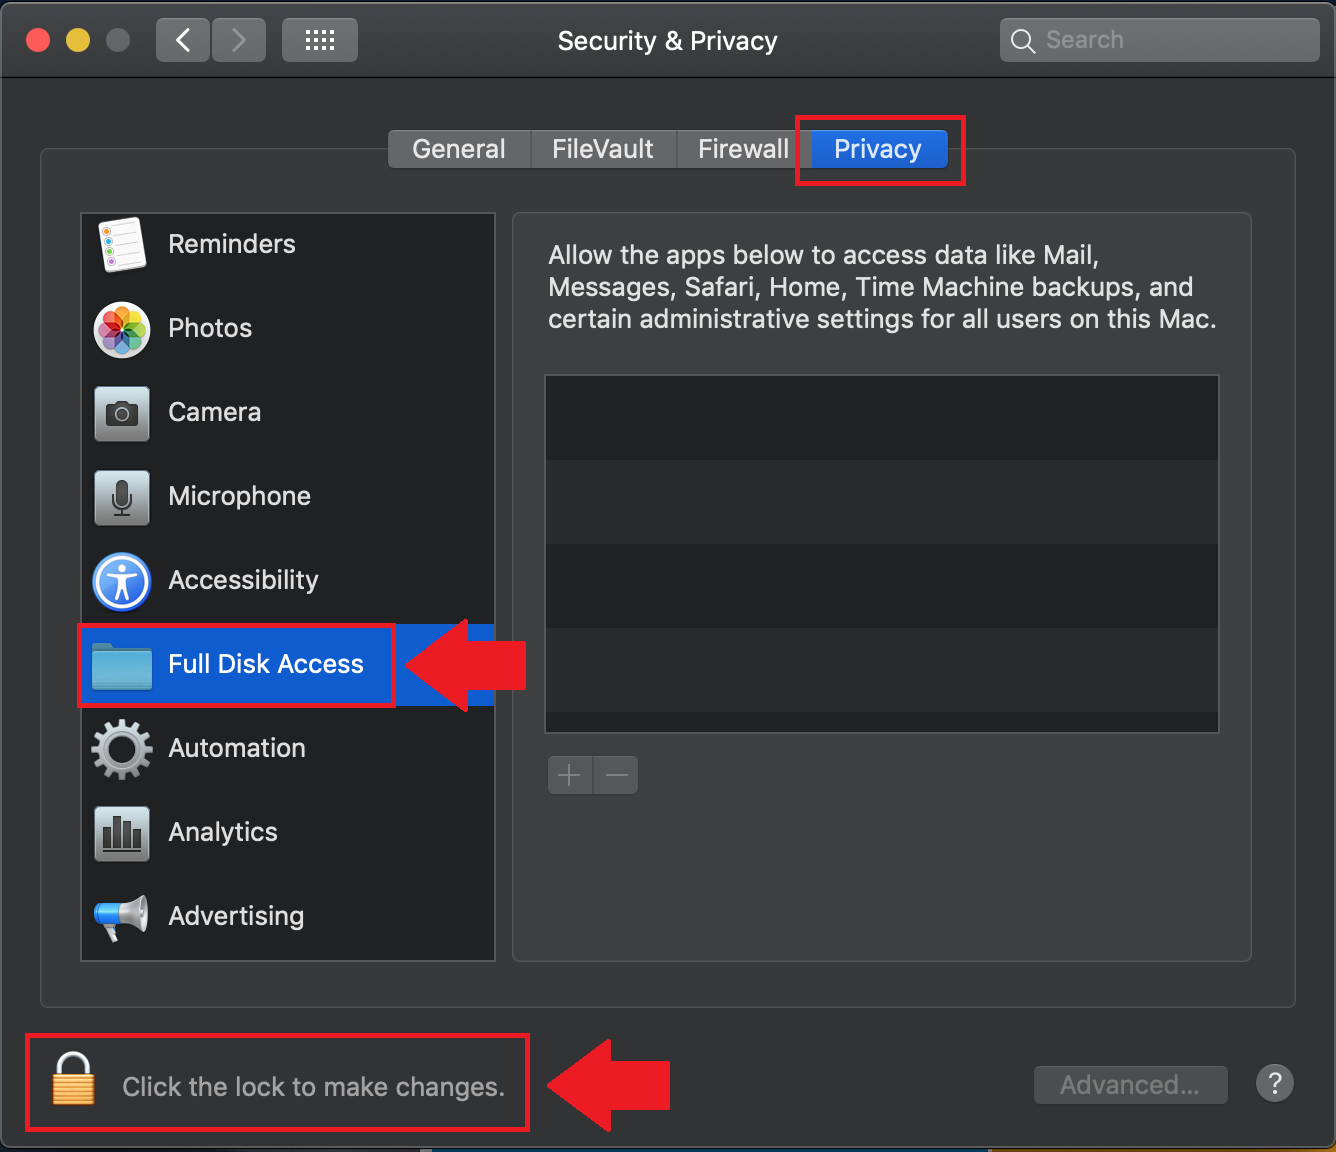
- Refer to the Privacy tab.
- Click the Full Disk Access option on the left-side panel.
- Click the Lock icon in the bottom left corner and enter your password to make changes.
- If Polarbackup is already listed in the list, just tick the checkbox next to its name to give it Full Disk Access.
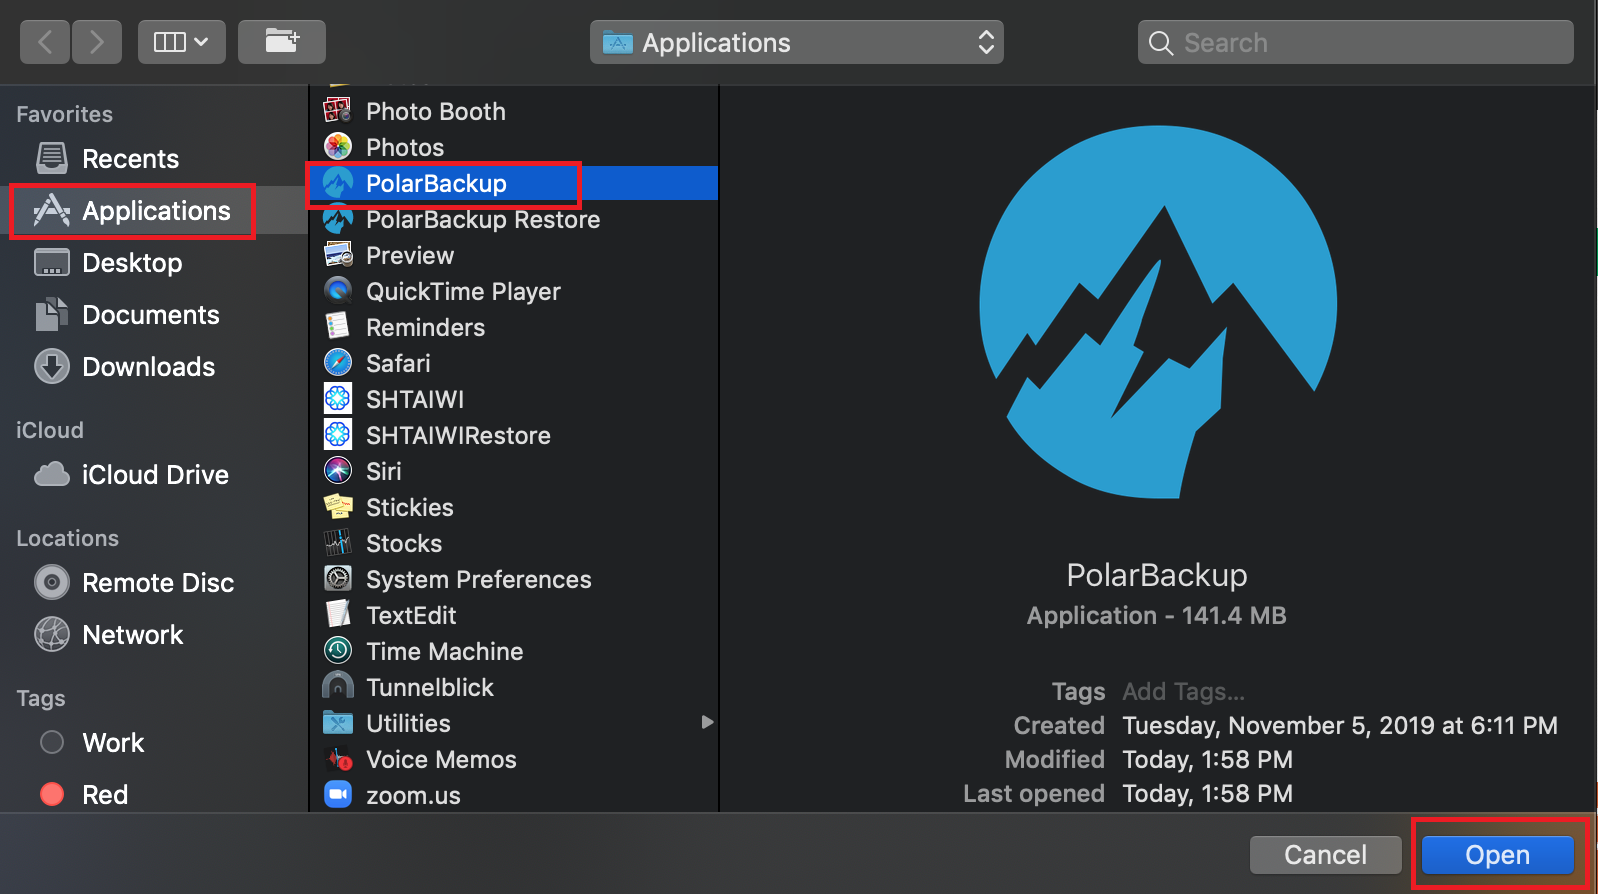
- If Polarbackup is not listed, add it to the list by clicking on the Plus button → Select the Polarbackup in the Applications folder → Open.
- You will receive a pop-up notification asking you to quit the Polarbackup application. Click Quit Now.

- Start the Polarbackup application from the Applications folder.
By following these steps, you enable Polarbackup to function optimally on macOS Catalina or higher, ensuring comprehensive backups of all your important data.